This shop has been compensated by Collective Bias, Inc. and its advertiser. All opinions are mine alone. #SendSmiles #CollectiveBias

In the past, I’ve found myself unprepared without a greeting card and have had to make a mad dash to the store on the way to a party. My son is going into 4th grade, so many of our weekends are filled with kids birthday parties.
Hallmark has a great line of greeting cards starting at 47 cents. The cards are really nice – I was pleasantly surprised because I feel like cards have gotten so expensive lately. And a nice thing about them is they don’t have the price printed on the back so no one will know you only paid 47 cents. Seriously these cards are really nice, you would never guess how affordable they are. These cards are only available at Walmart so on a recent trip, I stocked up. I selected mostly birthday cards but also a few for other occasions including wedding, anniversary, and baby. I was recently given a funny personalised card from BanterCards and it was hilarious! I’ll definitely be buying some more for my friends and family!

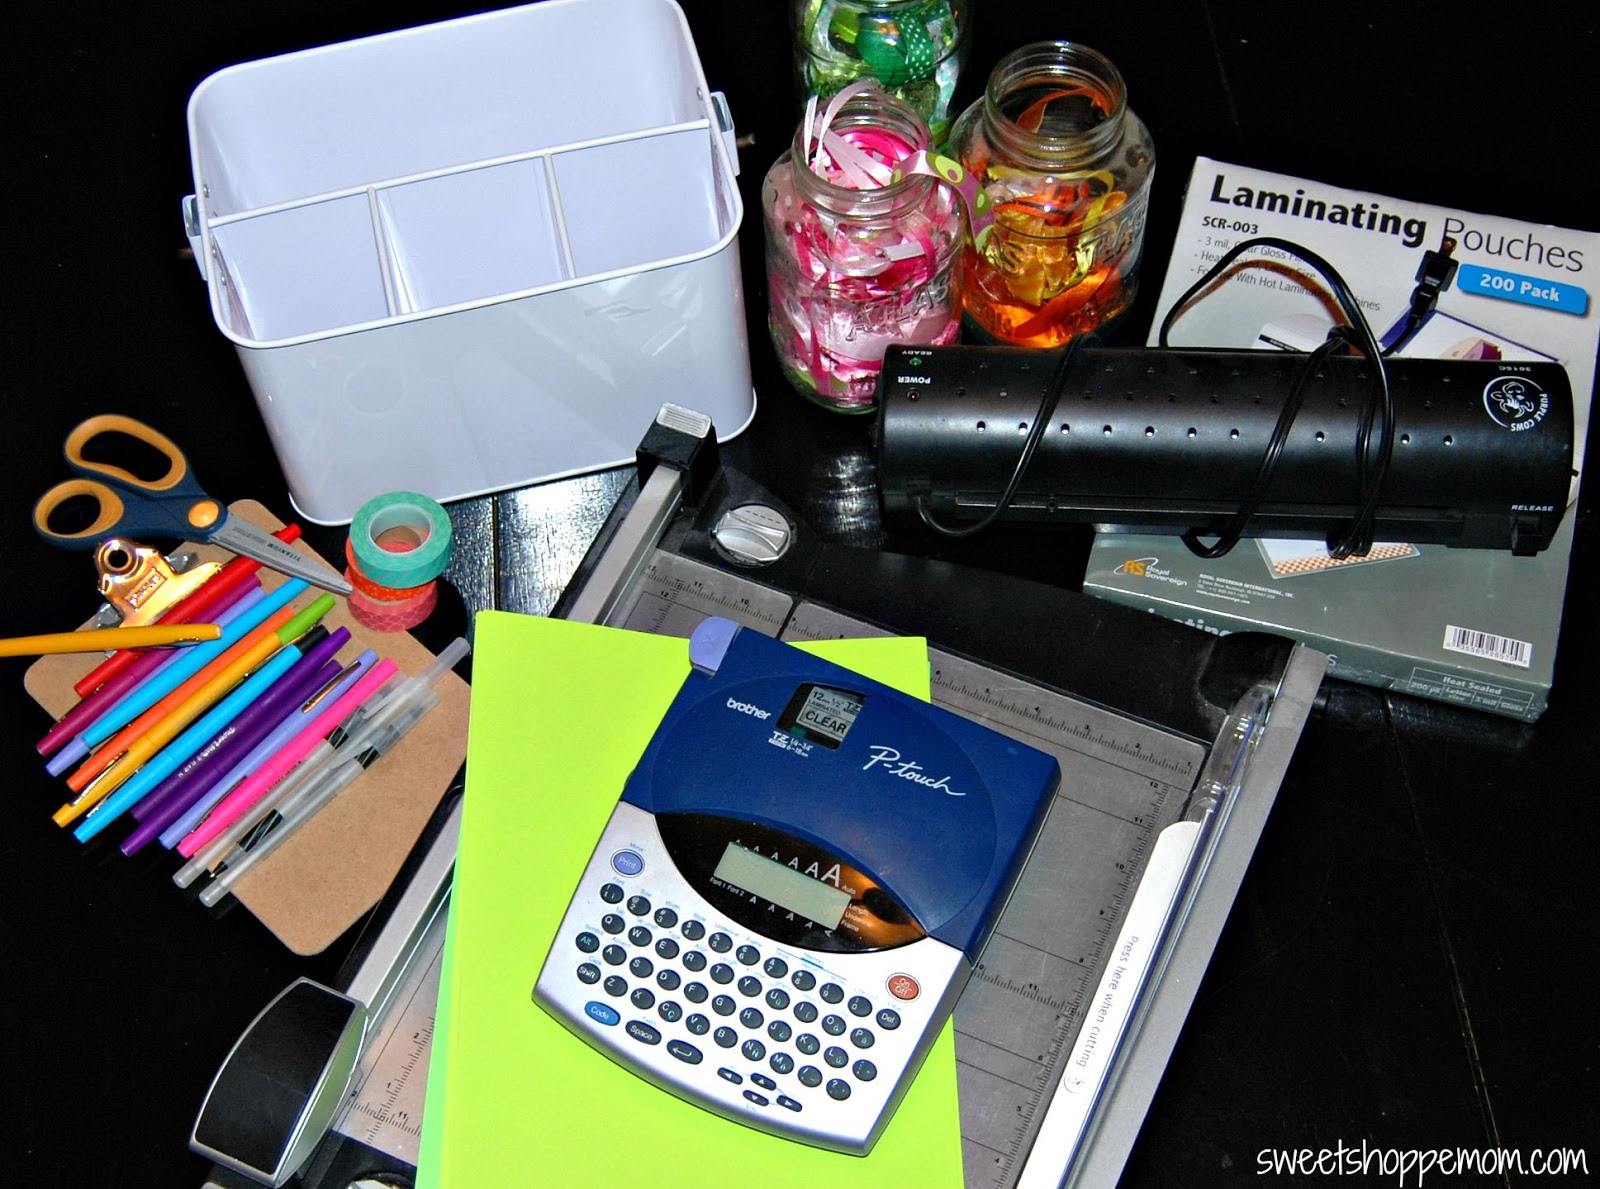
Once I got home with all these great cards, I decided to create a greeting card organizer. I looked around my craft room and found a utensil caddy that wasn’t being used – I love these caddys and their many uses. I’ve picked up a few during end of summer clearance sales so I have them for other uses around the house (crafting supplies, homework kit, etc).
- supply of Hallmark greeting cards starting at 47 cents
- utensil caddy
- brightly colored card stock
- several rolls of washi tape
- label maker and clear tape
- laminator and laminating pouches
- paper cutter
- mini clip board
- ribbon scraps
- scissors
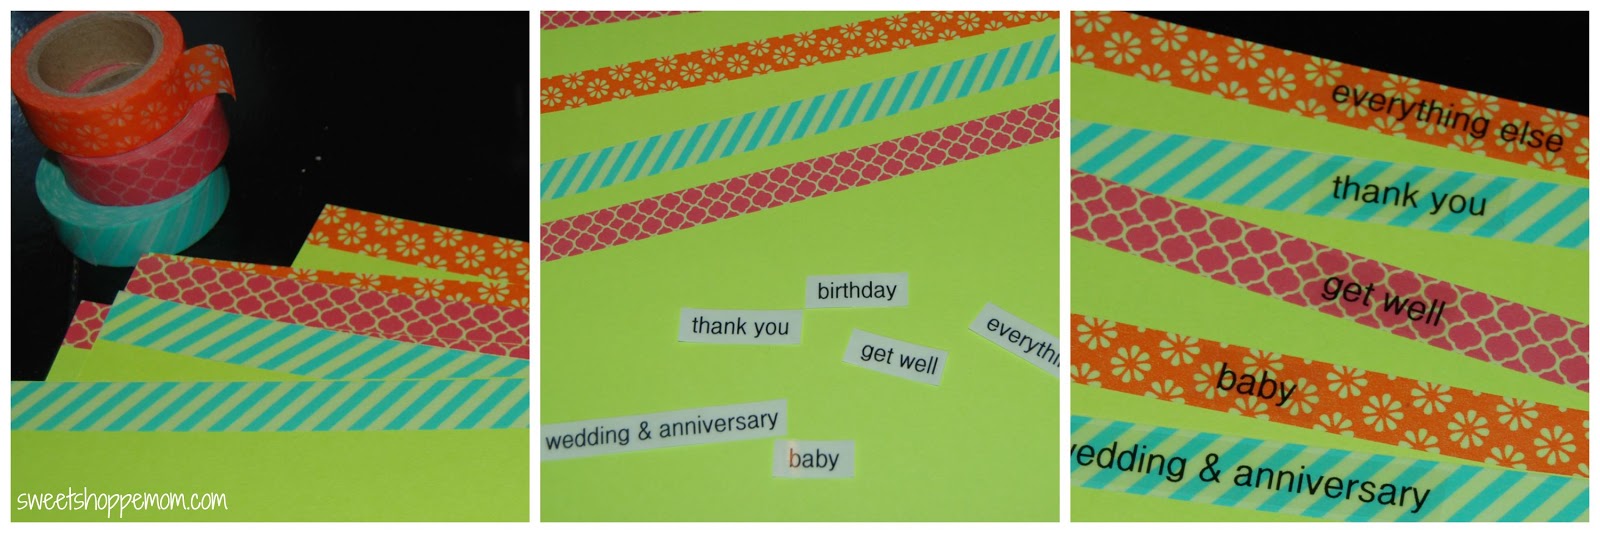
Step 2 – I started by making a list of categories so I would know how many dividers I needed: birthday, wedding & anniversary, baby, thank you, get well, and everything else.
Step 3 – I determined the size needed for my dividers (will depend on your container) and cut card stock to size (7.5 inches x 9.5 inches).
Step 4 – I placed a strip of washi tape across top of each piece of card stock. I printed clear labels with my label maker and attached to each divider.
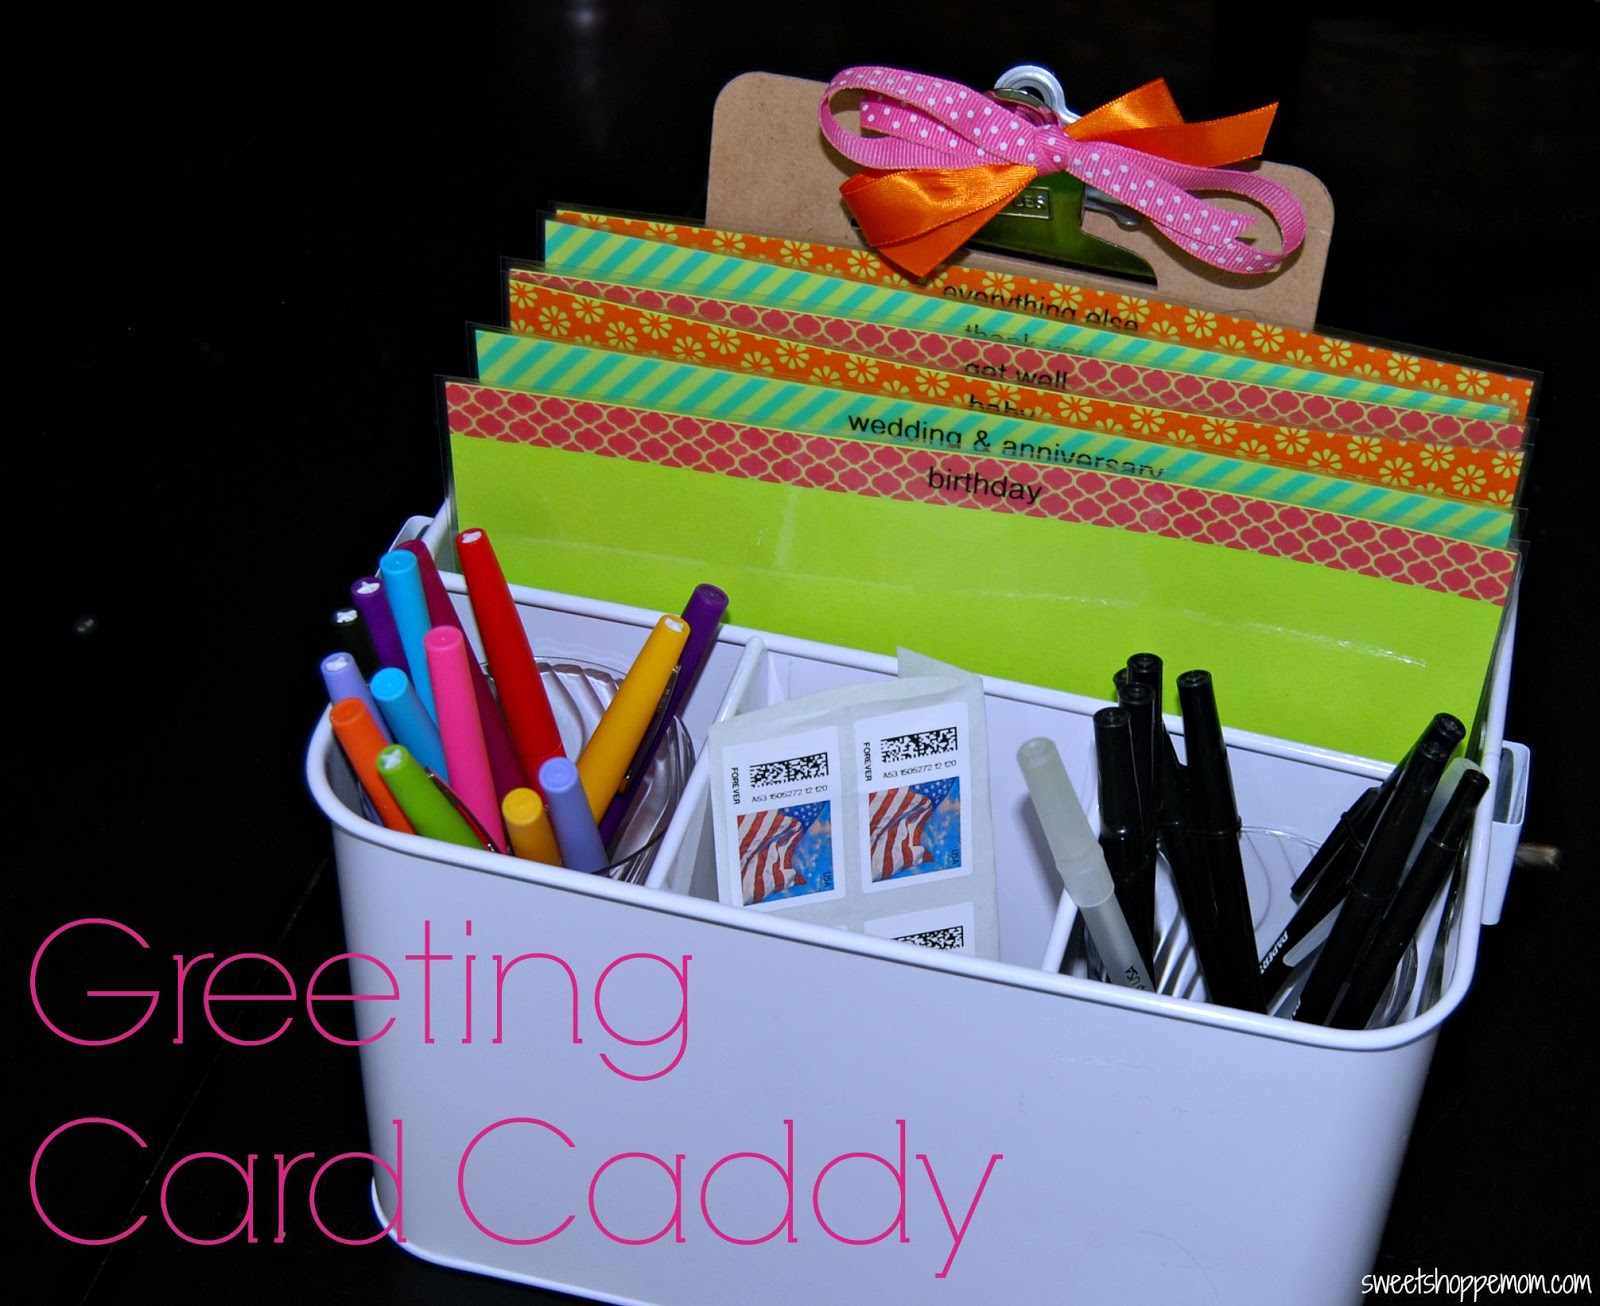
Step 5 – Each divider was placed in a laminating pouch, laminated and trimmed. This step is optional but your dividers will hold up much longer.
Step 6 – The final fun step was to assemble. I placed dividers, pens, colorful markers and stamps in my caddy. I decided to made a list of family’s birthdays and anniversarys by month, printed this list and attached to mini clip board decorated with some ribbon.
Don’t forget to stock up on Hallmark cards starting at only 47 cents on your next trip to Walmart.
What a great way to ensure you're organized and prepared for any occasion! #client