Who’s doing their own nails these days? I go through phases where I get my nails done but then I get busy and I switch to doing them myself. It’s a lot of time spent at the salon and you have to go every 2-3 weeks. Plus it’s a huge money saver to do them yourself.
I love getting in the festive spirit for holidays decorating the house, making themed foods, and I gave themed nails and try and it wasn’t that hard at all. Now I did stick to simple designs and I’ll leave those advanced designs for the experts.
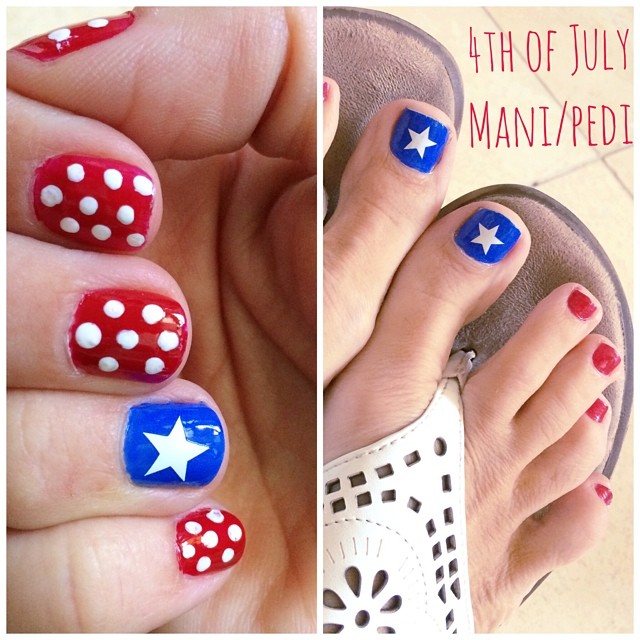
Manicure and Pedicure Nails for the July Fourth Holiday
Materials needed:
- base coat
- top coat
- red nail polish
- blue nail polish
- white nail polish
- vinyl cutting machine such as a Cricut
- white vinyl
- manicure dotting pen
Step 2- Paint your nails with a base coat
Step 3 – Paint your nails red and blue. My preference is to do the ring finger and the big toe is blue with the rest red. Alternatively, you could do every other toe (you will need more stars)
Step 4 – Pour out a little white nail polish (use a cleanable or disposable surface). Dip your tool into the white and dab on fingernails to make polka dots. My toenails are too small for dots so I skip the dots on my toes. Let dry.
Step 5 – Add vinyl stars to blue painted nails
Step 6 – Finish with a topcoat. This is a critical step to keep the vinyl star attached. I also find the white dots wear off easily so a topcoat protects the dots too.
Looking for more ways to get into the July 4th spirit?
- 3 Easy Fourth of July Centerpieces
- Celebrating Fourth of July with Teens
- Easy Fourth of July Festive Sweets
Are you going to try this? Give it a try, please post of social media and tag me, @sweetshoppemom. I’d love to see it!